
Seed Starting 101
Now that you're ready to embark on your seed starting adventure, let's go over what you need to know to get growing.
What do you need?
You'll need some essential supplies to get started, including:
Seed trays or pots. This could be something you buy, or old yogurt containers with a hole drilled in the bottom or even an egg carton.
A quality seed starting mix. This is different from regular potting soil/mix – it is sterilized to reduce the chance of seedlings developing disease and dying.
Seeds of vegetables you want to grow. Looking to save money – share packets of seeds with a friend – you only need a few.
A warm area for germination. This can be a warm spot on top of a refrigerator or using a heat mat to create warmth. Most seeds like temperatures over 75-85 degrees to germinate!
A light source. Young seedlings need 12-15 hours a day of light- during a time of year when we are only getting 8-9 hours of daylight!
Choosing Your Seeds
It may seem obvious, but you should plant seeds of vegetables that you like or want to try. Do some investigation into what those plants need – are they things you can give? Do you have enough sunlight for the plant? Do you have enough space for the plant? A squash can take over an entire garden if left to spread on the ground! But you can also grow a squash upright with a support pole – it just requires a bit more effort and attention.
Seed packets will give you a lot of information to guide your choices. If the seed needs to be started well before frost, the packet will tell you how many weeks before your last frost to start them. Make sure you know when your last frost is – but remember this is an average. So don’t think you’ll be planting your veggie babies in the garden at that point.
Some seeds should not be started indoors, mostly because they do not transplant well. Root vegetables like carrots and radishes are a good example. Some can be started indoors, but can also be planted right in the garden in the spring. If you are short on indoor seed starting space, you may want to start only those seeds that must be grown this way. In the northeast area where I am, those include eggplant, tomatoes, and peppers. These all need to be started somewhere between 6 and 12 weeks before last frost, depending on the variety.
Now that we’ve done our homework and selected our seeds, it’s time to get planting.
Sow Your Seeds
Start by wetting the soil in a bucket. You want the soil to be moist, but not soggy. Fill your trays or pots with the soil and pack lightly. You do not want the soil to be compacted, but also don’t want it to be so fluffed up that it settles too much after planting. Follow the instructions on the seed packet for proper planting depth and spacing. Make sure to label your trays or pots so you can keep track of what you've planted.
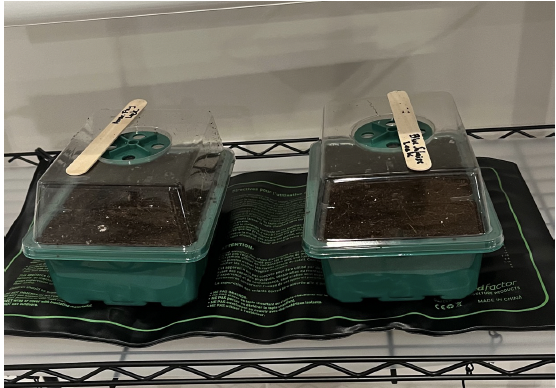
Seeds need warmth and moisture to germinate. Covering your seed trays/pots with a plastic dome or putting it inside a bin with a lid will help keep moisture in the soil. I use a heat mat under the trays to speed germination but have known people to use the space on top of the refrigerator or near a heater. Do not put them on top of a radiator as that will be too hot. Check your trays/pots at least every other day. Water if they appear dry. Once you see the seeds germinating – in other words, when the seedlings are starting to grow – you can remove the cover. At that point, too much humidity makes the plants prone to disease.
Once the seeds have sprouted, move them to a bright location or provide supplemental light with grow lights. This is one place I really encourage people to spend a bit of money and buy supplemental grow lights. Our natural light is just not enough at that time of year. There are many inexpensive LED options to give your seedlings their best start.
Caring for Your Seedlings
Keep the soil consistently moist but not soggy and provide good air circulation to prevent a disease called damping-off. A light fan can help your seedling’s stems become stronger as it mimics wind.
Your seeds contain all the nutrients the plant needs to get started in life. As the seedling begins to grow, you will first see a set of 2 leaves that are called cotyledons. These provide nutrients to the growing plant. The second set of leaves that appear are called the “true leaves.”
Once you see the second set of true leaves, you can start to feed your seedlings with fertilizer. There are lots of organic fertilizers on the market. Vegetable plants need regular fertilizer throughout the growing season to produce lots of yummy vegetables!
Harden Off and Transplant
About a week before you transplant your seedlings into the garden, start “hardening them off” by gradually exposing them to outdoor conditions. This helps them adjust to the harsher environment outside. Start with a few hours outside in a shady area, or in morning sun and each day expose the plants to a bit more sun and heat. When all danger of frost has passed, transplant your seedlings into the garden, making sure to give them plenty of space to grow.
Keep Learning!
I learn something new EVERY year! Gardening will force you to be patient, resilient, and to problem solve all season long. No two years are the same – weather conditions, your attention, and pests all come and go. Some years are just bad for tomatoes – too wet, too cool, or you go on a long vacation and they don’t get watered. But maybe the squash thrived in those conditions. And there is always next year to try again!
Connect with fellow gardeners for advice, tips, and encouragement along the way. Whether it's joining a local gardening club, participating in online forums, or attending seed swaps and plant sales, there are lots of ways to connect with other gardeners who share your passion for growing food from scratch. Happy gardening!


Squash grown vertically with stakes